[Tutorial] Custom miniature base with miliput !
 Posted: April 16th, 2011, 4:35 am
Hi guys, I made a tutorial on how to produce custom miniature base with miliput.
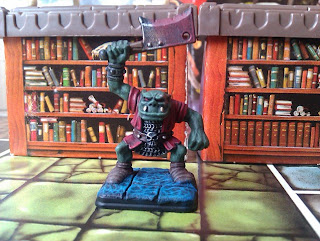
I took the opportunity to take pictures between each step. So you see how I do it better.

There are enough for 4 bases.
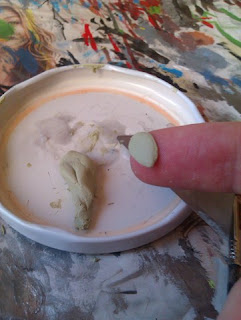
I cut a small part.

I flattened it. The shape is elongated.

I put it between the legs of the orc. Note the distance between the feet. This will help "push" the dough with your finger until it reaches the feet. Thus, it will not overflow.
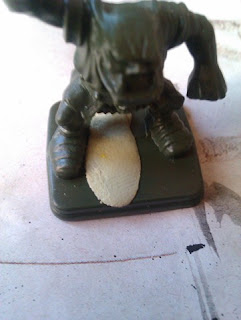
I pushed the miliput on one end.

We continue with the other foot. Not more than 1 mm thick miliput eh!
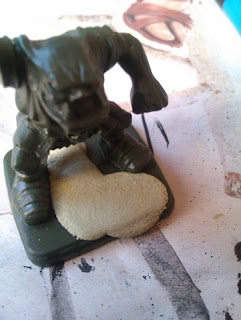
You will notice that I drive the surplus toward the outside of the base.
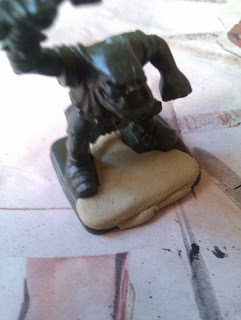
This is most obvious here.

I cut the excess with the blade of a knife. Be careful not to shred the plastic!
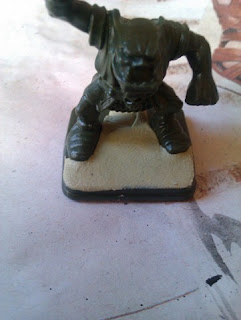
The front is finished.

Beginning of the back.

Same process ...

We always press the surplus to the outside of the base. I also flattened the middle between the two legs by slightly wetting the blade of the knife. I just then moved on the miliput with the flat of the blade. Wetting the blade allow to slide out without hooking the miliput.
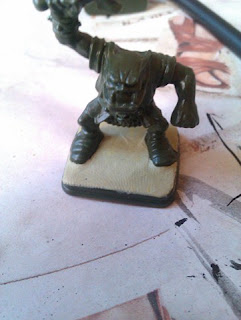
The finished base.

Dip the cutter blade in water. The miliput is highly soluble, it allows the miliput not to hang with the blade.

With the corner of the blade that is not sharp I streak the miliput to form the pavement.

The pavement is finished.
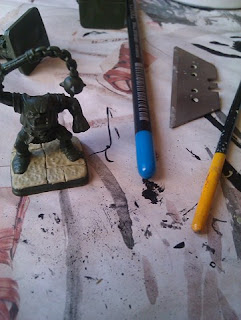
My tools for the relief of the pavement: two round brushes at the end. A "large" one and more "little" one.

I start to stamp with the biggest on the surface.
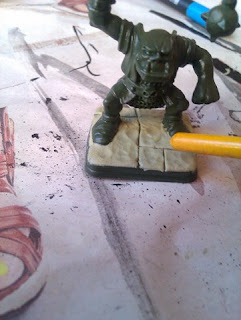
I finish with the smallest. Note that in some places, you'll have to redefine the pavement.

The relief is finished !
There it is ! It seems easy, I assure you it is !
Be kind to let me some comments on the original post on my blog : http://heroquest-painted.blogspot.com/search/label/Tutorial%20socles%20figurines
I took the opportunity to take pictures between each step. So you see how I do it better.
There are enough for 4 bases.
I cut a small part.
I flattened it. The shape is elongated.
I put it between the legs of the orc. Note the distance between the feet. This will help "push" the dough with your finger until it reaches the feet. Thus, it will not overflow.
I pushed the miliput on one end.
We continue with the other foot. Not more than 1 mm thick miliput eh!
You will notice that I drive the surplus toward the outside of the base.
This is most obvious here.
I cut the excess with the blade of a knife. Be careful not to shred the plastic!
The front is finished.
Beginning of the back.
Same process ...
We always press the surplus to the outside of the base. I also flattened the middle between the two legs by slightly wetting the blade of the knife. I just then moved on the miliput with the flat of the blade. Wetting the blade allow to slide out without hooking the miliput.
The finished base.
Dip the cutter blade in water. The miliput is highly soluble, it allows the miliput not to hang with the blade.
With the corner of the blade that is not sharp I streak the miliput to form the pavement.
The pavement is finished.
My tools for the relief of the pavement: two round brushes at the end. A "large" one and more "little" one.
I start to stamp with the biggest on the surface.
I finish with the smallest. Note that in some places, you'll have to redefine the pavement.
The relief is finished !
There it is ! It seems easy, I assure you it is !
Be kind to let me some comments on the original post on my blog : http://heroquest-painted.blogspot.com/search/label/Tutorial%20socles%20figurines
 I need to finish 13 orcs, so 10 left! And then after they dry, I need to paint them of course.
 but I'll correct that on the next batch.
