Page 1 of 3

Gimp painted tile. First try.

PostPosted: March 31st, 2016, 10:00 am
by tallyho
Took about 3 hours.
Any opinions ?

Image

Re: Gimp painted tile. First try.

PostPosted: March 31st, 2016, 11:31 am
by Anderas
Rather take an existing and change

For example here
http://pyromancers.com/dungeon-painter-online/

Afterwards the rest is easier to do

You can also take yours and marry with some kind of BMP so that you keep your nice drawing and have a surface impression nevertheless

Re: Gimp painted tile. First try.

PostPosted: March 31st, 2016, 1:46 pm
by tallyho
Ive certainly have "borrowed" my chare of stuff from the net. And still do :oops:
But when it comes to gameboards, its nice to have something selfmade.
I agree, it do need some more work to be done.

Re: Gimp painted tile. First try.

PostPosted: April 2nd, 2016, 9:47 am
by torilen
For a first try, pretty good. I like it.
I gotta admit, my art talent is next to zip - so it's definitely better than
I could do, in any case.

Re: Gimp painted tile. First try.

PostPosted: April 2nd, 2016, 6:15 pm
by tallyho
Thanks,
All it took was some knowledge about Gimp. And some search on You Tube and Google Pictures. Set up background layer and a layer grid. Then start drawing. painting and choose colors.
Here with some details.


Image

Re: Gimp painted tile. First try.

PostPosted: April 3rd, 2016, 3:08 am
by Goblin-King
Disclaimer: I've never used GIMP, so sorry in advance if the things I say don't apply here ;)

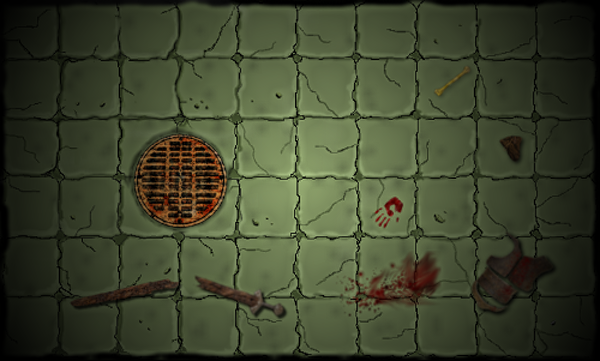
Well... It's not a masterpiece, but it looks pretty decent for a custom board for playing with friends.
A couple of suggestions for next time:

Don't ever ever use the pencil tool! In the original picture it's very clear it has no softness to it which makes it look pixilated. Unless you are making an early 90's Windows game, you don't want that.
Only use brush tool and spray tool. Be sure to set the brush to have a certain softness so you don't get those jagged pixels.

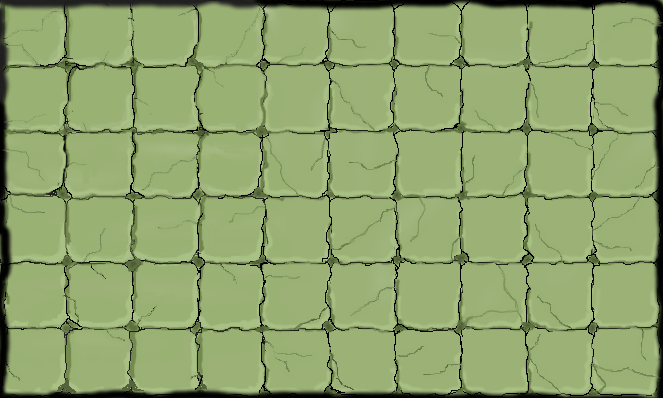
I generally find it a nice thing to make the picture in double size. Makes it easier to paint certain things and go into detail.
Then when I'm done I scale it down 50%. This makes different parts blend together very nice.

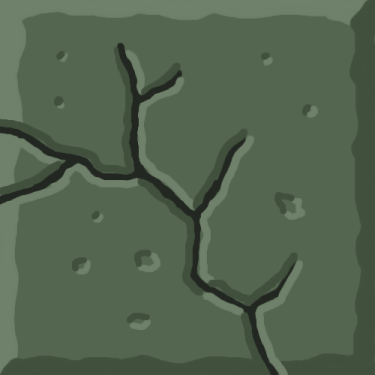
When making cracks in the stones, make a thin bright line along one side of the cracks and a dark shading on the other side.
Notice how the light direction is consistent throughout the tile. It's important to add depth to the details. If not they are just lines on the tile.
Image

You could also consider making a new layer and use the flood fill tool with a gradient to create a sense of illumination. It really makes the room come more alive.
I have exaggerated a bit here to show what I mean. It should be more subtle in my opinion. Of course it all depends on the look you want to achieve ;)
Image

Re: Gimp painted tile. First try.

PostPosted: April 3rd, 2016, 5:12 am
by tallyho
You're absolutely right, thanks for your advice. Just what i needed to take it a step further.
Now i have to figure out the flood fill tool.. Shouldnt be to difficult.
Anyone with more tips and tricks, please share.

Re: Gimp painted tile. First try.

PostPosted: April 3rd, 2016, 8:21 am
by tallyho
Followed Your advice GK. Got out, Gimp-Filters-Light and shadow-Lightning effect, and fooled around with it.
Always wondered how to get a torch on the wall.
Not sure if i got it right.
Maybe have a gamerule that says "Monsters are afraid of flames"

Image

Re: Gimp painted tile. First try.

PostPosted: April 3rd, 2016, 12:17 pm
by Goblin-King
Looks much better already.
Remember torchlight isn't white though, but red/orange/yellow.

But keep playing around. Playing is the best way to learn ;)

And ask if you need help with anything specific.

Re: Gimp painted tile. First try.

PostPosted: April 3rd, 2016, 12:21 pm
by Anderas
Maybe, if you can, take the reflections from the bloody hand there.
And yes, i notice three things:
With the additional items, it looks much better
with the lighting it looks much better
and with the spurious black color you distributed among the floor tiles, it looks much better.

if you add some slight hint of grain or noise before the additional items and the lighting layer comes, it makes more the impression of stone instead plastic.