Making Miniature Photos
Hey Redav,
i am absolutely thankful for tips about photography. I had my hard time working out the settings - i know the theory but i am not a photographer.
My lumix stands on a tripod. I use 2 seconds self-timer in order not to shake the camera. There is an electronic shutter and a mechanical shutter. So he could use shutter times as he likes, but the max he does is one second.
 Why build they restrictions like that into a camera software? It's not the first time i'd like to update it myself. With my old cam i was sucessfully hunting lightning strikes with shutter times of 10 seconds and a serial picture function. This camera is supposed to be a lot better.
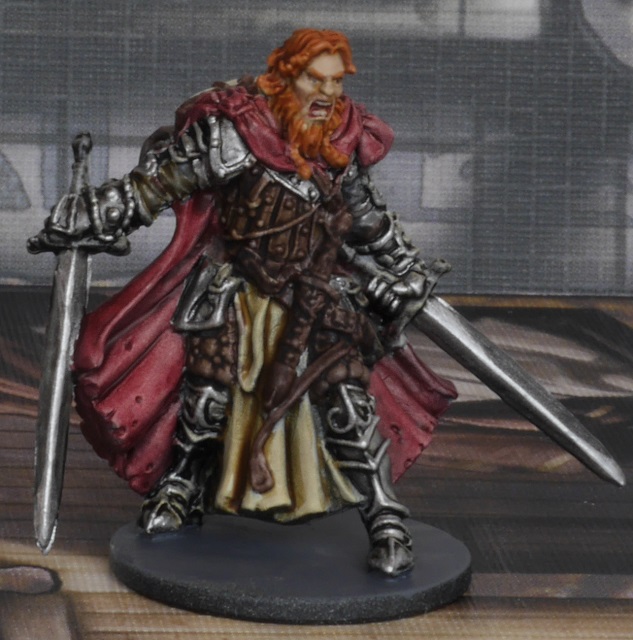
First plan was to shut the aperture as much as possible and use super long shutter time in order to have the entire zombie group sharp. With this cam, it doesn't work. Instead, everything is medium sharp and loses colors. (what the heck, the picture loses COLORS? See xuxa and clovis first photo - dull colors, non-sharp details)
The lumix is going down to iso 160 and up to 1600. It was one of the values i was playing with. 160 pixelates the picture a little bit and 1600 noises a lot but has a super fine resolution. I was freaking out about the resolution thing a bit. Why should a digicam reduce the resolution just to emulate an ISO 160 film?
so, this is Clovis with F 22 and Iso 1600
This is Clovis with F22 and Iso 160
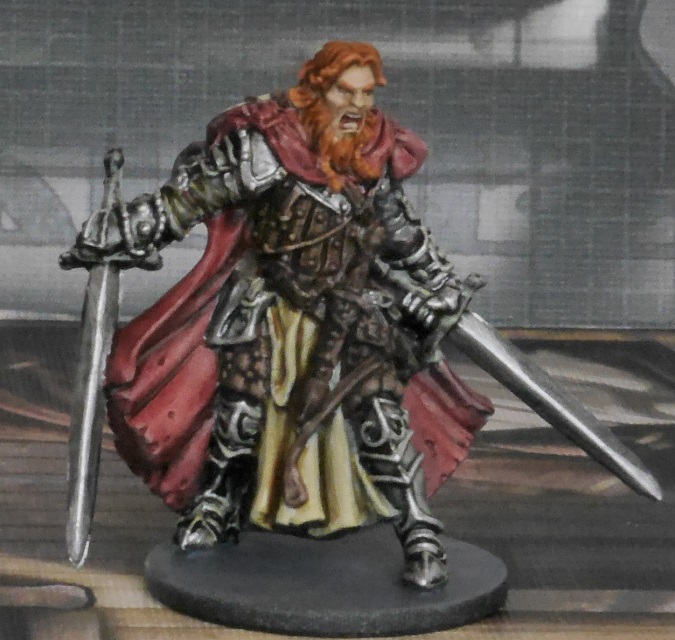
Sharpness goes from Clovis until the background, which is too much for sure, except for the planned group photo of all Zombies.
But it is really semi-sharp everywhere.
The current batch of photos is done with Iso 160, large aperture (F - 5,6) and a shutter time the camera may choose herself. It works but i don't know why. Strangest thing is that i have the feeling it was working because i reduced the camera photo resolution by half.... I guess it is another software thing in the camera. With this setting, the colors are as should be, and you can see every painting failure and every mold line.

I really think that more than half of my issues are related to the Camera Chip and Camera Software.
i am absolutely thankful for tips about photography. I had my hard time working out the settings - i know the theory but i am not a photographer.
My lumix stands on a tripod. I use 2 seconds self-timer in order not to shake the camera. There is an electronic shutter and a mechanical shutter. So he could use shutter times as he likes, but the max he does is one second.
First plan was to shut the aperture as much as possible and use super long shutter time in order to have the entire zombie group sharp. With this cam, it doesn't work. Instead, everything is medium sharp and loses colors. (what the heck, the picture loses COLORS? See xuxa and clovis first photo - dull colors, non-sharp details)
The lumix is going down to iso 160 and up to 1600. It was one of the values i was playing with. 160 pixelates the picture a little bit and 1600 noises a lot but has a super fine resolution. I was freaking out about the resolution thing a bit. Why should a digicam reduce the resolution just to emulate an ISO 160 film?
so, this is Clovis with F 22 and Iso 1600
This is Clovis with F22 and Iso 160
Sharpness goes from Clovis until the background, which is too much for sure, except for the planned group photo of all Zombies.
But it is really semi-sharp everywhere.
The current batch of photos is done with Iso 160, large aperture (F - 5,6) and a shutter time the camera may choose herself. It works but i don't know why. Strangest thing is that i have the feeling it was working because i reduced the camera photo resolution by half.... I guess it is another software thing in the camera. With this setting, the colors are as should be, and you can see every painting failure and every mold line.
I really think that more than half of my issues are related to the Camera Chip and Camera Software.